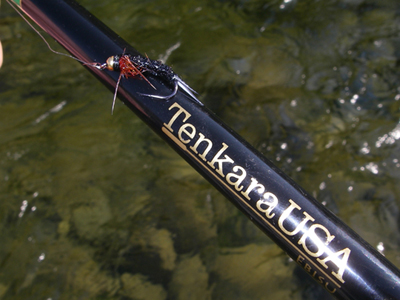
No this isn't some sort of inscrutable Zen Koan--although it could be. A fly rod is not a fly rod when it's a Japanese rod called a Tenkara.
Modelled after long bamboo fishing poles used over the centuries in Japan, the modern Tenkara rod combines graphite materials in a telescoping rod format. There is no reel or guides, only a tapered line running from the rod tip to the tippet material. In many ways it is similar to pole rods fished the world over for species ranging from carp to bonefish, but this one is designed specifically with fly fishing in mind.
I ordered my first Tenkara rod about a month ago based on some online conversations I had with Mike Conner and CM Stewart. Both sang the praises of these unique rods for wet fly and soft-hackle fishing, but also mentioned Czech nymphing applications. I was intrigued and could immediately see application on my home streams for small trout and coarse fish. I ordered the 12' Ebisu 6:4 rod based on the style of fishing I do and to some extent based on the potential size of fish I would hopefully encounter. This is the mid-range in terms of "weight" offered by the importer, Tenkara USA. The ratio shown indicates the number of stiffer sections (6) and the number of more flexile sections (4), thus the Ebisu in this configuration would approximate a medium fast fly rod.
When I opened the mailing tube (received within days of ordering) and extracted the rod from its short case, I was immediately struck by the quality of manufacture. There were no epoxy drips or bumps in the sections and the attractive green section tops make for a rather modern looking piece of kit. The handle on this rod it the traditional pine as opposed to cork. Smooth and knot free, it sits quite comfortably in the hand. The design of the rod is such the cap at the bottom of the handle opens to allow the user to extract each section for cleaning or replacement. When retracted the business end of the rod is protected by a simple cap. Of all the various components the cap is a weakness in that there is no built in storage for it and it must be carried separate from the rod--I give it about 6 months before I lose it on some outing.
Extended, the rod tops out at the advertised 12'. The final section has a small piece of knotted cord fixed to it, and it is to the cord that the "line" is attached. When I ordered the rod I also picked up the recommended tapered furled line. While I like the way the furled leader turns over, I found that its tendency to coil when breaking off a snag and the subsequent need to carefully stroke the line up to 30 times or more to straighten it was too time consuming--particularly on my heavily canopied, bracken strewn home waters. I've since switched to a 5' tapered poly-tip couple with a 6' length of 8lb co-polymer down to 4' or more of 5x or 6x tippet. While not a very elegant set-up, I've found that it suits both the short flick cast used with this rod and the basic controlled drift presentation. In future I will be experimenting with a few different line and taper combinations to see if shortline modified spey casting is possible.
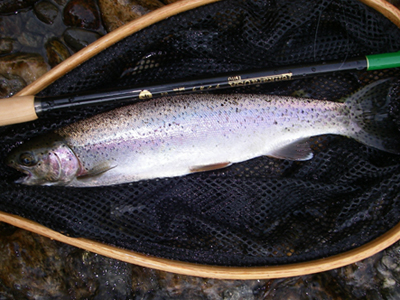
In my next post on the Tenkara I will be looking at a few of the techniques that can be used with these long rods, and where they work and don't work. In the meantime here is a little preview...

Aaron


